StanIROCZ
Mar 31 2010, 10:53 PM
QUOTE (trackbird @ Mar 31 2010, 03:03 PM)

Stan,
I told you I'd have to come help once I was done...
I said 'good' help

Bout all you did is drink beer, BS, and break my hammer (all things you are good at)
haha kidding kidding

Let me know when you have time and I'll stock the fridge and plan a project for you to help me with.
Racing Geek
Apr 1 2010, 12:56 PM
What?! How do you break a hammer?

StanIROCZ
Apr 1 2010, 02:59 PM
QUOTE (Racing Geek @ Apr 1 2010, 08:56 AM)
What?! How do you break a hammer?
it was a shot filled rubber dead blow hammer that got the end cut up when pounding in an overly tight pilot bearing. It's not completely broke since I still use it but I got to take shots at him whenever I get a chance.
trackbird
Apr 2 2010, 02:16 PM
I forgot about the near destruction of a "no longer perfectly good" hammer. Oops... That's really sad since hammers are my favorite tool, I really should treat them better than that. lol
trackbird
Apr 8 2010, 05:26 AM
I had Alan ship me a quick release for the stock column so I could get the seat in and still get out of the car. I'm still planning a woodward column, but I'm running out of time and money with an event coming up. So, I gutted the stock column and added a very nice quick release. It fits perfectly and without any slop. It also happened to bolt right up to my Grant steering wheel adapter. Here's the pics.
Blainefab
Apr 8 2010, 08:43 AM
Looks good - did you get all the lock stuff out OK?.
I usually trim 1/2" off the edge of the shroud so I don't pinch my fat fingers putting the wheel on.
trackbird
Apr 8 2010, 11:57 AM
All the lock stuff came out with some help from a pair of pliers. I just snapped the "toothed" section that engages the lock and then pulled it out from the bottom after I took the collar off the lower section of the wheel.
I was looking at the spacing once it was together. I suspect that I'll cut a section off as well. It's not needed and I can see me smashing my hand as well. Nothing a sawzall won't fix.
Blainefab
Apr 8 2010, 07:00 PM
If you haven't taken care of VATS elswhere, measure the R value of the key pellet, and wire the same value R on the car end of the orange harness.
Also, brake light power is tied thru one of the connectors that you removed - you'll need to jumper a couple of wires together.
trackbird
Apr 8 2010, 07:52 PM
VATS is long gone from my chip (so I should be good there) and I'm going to wire the brake lights from scratch (as well as almost everything else). I'm going to hook up the stock connector to the brake light switch and just wire the brake lights to work.
I wondered about the lights and then decided it wasn't going to matter for me. Good stuff to know in case I ever need the info on another project. Thanks Alan!
trackbird
Apr 10 2010, 01:45 AM
Rear view mirror and brake ducts just arrived via UPS and I should pick up my lexan windshield at Jegs tomorrow.
StanIROCZ
Apr 10 2010, 12:32 PM
QUOTE (trackbird @ Apr 9 2010, 09:45 PM)
Rear view mirror and brake ducts just arrived via UPS and I should pick up my lexan windshield at Jegs tomorrow.
I got the same wink mirror (4 panel, 28") and mounted it just last weekend. I might still be in the lead
trackbird
Apr 11 2010, 04:12 AM
Well, I guess I shouldn't have screwed off at the shooting range today and locked myself in the garage instead...

trackbird
Apr 16 2010, 04:17 AM
One half of the UE PHB relocation kit is drilled and welded. I'm not completely happy with a few spots in the weld. I cleaned everything off with a die grinder and a sanding (roloc) disk, but I still found some dirt. I'm going to cut a piece to seal up and strengthen the gap on the back side. I just didn't get that done yet. Also, don't forget to move your halogen lamp when you're welding. It seems that it makes great light when placed right under the parts to be welded. It also seems that once enough slag lands on it, KABOOM...the tempered glass explodes. I meant to move that...maybe next time.
StanIROCZ
Apr 16 2010, 11:08 AM
QUOTE (trackbird @ Apr 16 2010, 12:17 AM)
I'm going to cut a piece to seal up and strengthen the gap on the back side.
I did the same thing. That is the best thing you can do to beef that up.
trackbird
Apr 19 2010, 03:21 AM
I added the reinforcement to the chassis side bracket. And I added a reinforced structure to the axle bracket so that the tubular support that's tied to the axle doesn't interfere with the PHB and my various adjustment points. I will have to thank Jon A at this point. I decided not to reinvent the wheel, so I used a similar design to the bracket he built for his PHB relocation kit. I guess imitation is the highest form of flattery. Thanks Jon!
Also, I hadn't realized that the factory bolts were too short to work with the extra appendage on the back of the bracket. But I'd already drilled the holes for the stepped design of the factory bolts. So, after scratching my head a lot, I wound up gathering up all new 14mm bolts and washers and drilling all the holes out to 9/16. It wasn't the most elegant solution, but I couldn't use the 1/2" stuff with my stepped spacers. And I had already drilled for the larger hardware on one side. The logical solution was to drill out the other PHB spacers and drill out all the bolt holes. Sadly, "nothing" is ever going to fit this car without some amount of work now...but that's how it goes I guess.
I also welded the axle bracket in place. The welds to the PHB flange look good. The welds between the bracket and the axle tube where I attached the tubular support look absolutely terrible. So, no photos until I grind them out and weld them all over again.
trackbird
Apr 21 2010, 03:53 AM
I started on the dash last night. I'm going to need something to hold the gauges, so I laid out a template and then measured, marked and drilled holes. Then I tig welded (and not very well) a bracket to the back side to hold the wideband O2 display and shot it with some self etching primer. Then the primer had some runs, I wiped them off and primed it again (outside in the dark). Tomorrow, I'm going to sand off the ugly parts and prime it one last time. Then paint and start assembling gauges and wiring them up.
Once that's done, I'm going to finish the PHB relocation bracket install (which is in progress but not finished), wrap up the cage (and seat mounts) and get the rest of the dum dum out of the interior so we can paint it.
Heading into crunch time, I have to complete the following:
- Finish the PHB relocation brackets (clean up welds and final weld)
- Finish weld the door bars, remaining cage bars and weld the cage to the floor
- Fab the seat mount
- "0" my timing pointer
- Prime engine and install distributor
- Assemble and wire dash (and weld in a bracket for it)
- Swap out steering (intermediate) shafts
- Install and shim starter
- Clearance and insulate exhaust (or weld in a section of stainless if I can find some)
- Wire car
- Install lexan windsheild
I think I'm going to save the front bumper and oil cooler install for after the NFME as well as some of the other projects that may not get completed in time.
trackbird
Apr 23 2010, 04:24 AM
Ok. I ground out the welds on the axle side of the PHB relocation kit. I can say that the parts are not going to come apart, but I had the worst time welding that reinforcing tube to the axle and my bracket on the bracket. It looks like crap. For now, I'm leaving it. I very well may cut it off and replace it with something in the near future.
My neighbor does art work and has a '68 Camaro (big block powered) and I loaned him some tools and we got talking about my project. Anyway, long story short, he took the air brush to my new dash panel (we both decided it wasn't anything we couldn't paint over if we wanted to) and I think it might be pretty cool once I get the gauges in it (though air brushing anything is generally not my thing as many of you know). He did a nice job and I'm going to stuff it full of Autometer Ultra-lite gauges and see how it looks. He also sketched a paint design (based on the free Maroon paint we are going to use as a base coat, it's a hand sketch from memory, so it's kind of a 1st/3rd gen hybrid, but it shows his ideas). We may swap the gold for a charcoal (graphite, like my wheel paint?...which we used as the base color on the dash panel too).
Here's the pics:
Phil
Apr 24 2010, 12:44 AM
the gauge panel looks great!
trackbird
Apr 24 2010, 04:27 PM
Thanks Phil! I'm not usually much for making things "pretty", but i have to admit, I think it's going to look great once it's all assembled. Ryan does fantastic work.
As for the rest of the project, the PHB relocation is done (the axle is at full droop in the photos). We finish welded some more of the difficult to reach locations on the cage and I hope to have it completed by the end of this weekend.
trackbird
Apr 25 2010, 05:45 PM
The wideband O2 isn't in there, the mechanical water temp gauge isn't in there (I hate to move the capillary tubing around more than needed) and I'm waiting on the trans temp gauge which should arrive tomorrow. But that's about what it will look like.
trackbird
Apr 26 2010, 02:18 AM
The strut tower bars are in and welded (I found some dirt on the bottom, I ground it out and cleaned it up and will fix it tomorrow). The dash bar is in and welded. Tomorrow I am going to weld the cage to the floor and install the diagonal, the harness bars and the inverted V for the rear. I'll cut the other two bars from the main hoop (by the floor) to the rear shock tower plate and start fitting the corner gussets.
With any luck, the cage will be done tomorrow and I can start on the seat mount and brackets for the dash...(and the rest of the list).
trackbird
Apr 27 2010, 10:21 PM
QUOTE (trackbird @ Apr 25 2010, 10:18 PM)
With any luck, the cage will be done tomorrow and I can start on the seat mount and brackets for the dash...(and the rest of the list).
So much for that idea. Suddenly nothing is welding right and I'm grinding more welds out than I'm putting in...only to have them look worse than before. Racerdad916 and I are going to look at it tonight and I'll figure out what to do with it from there. The way today has gone, I'm getting pretty close to scrapping the chassis and selling the rest as parts.
robz71lm7
Apr 27 2010, 10:53 PM
QUOTE (trackbird @ Apr 27 2010, 06:21 PM)
QUOTE (trackbird @ Apr 25 2010, 10:18 PM)
With any luck, the cage will be done tomorrow and I can start on the seat mount and brackets for the dash...(and the rest of the list).
So much for that idea. Suddenly nothing is welding right and I'm grinding more welds out than I'm putting in...only to have them look worse than before. Racerdad916 and I are going to look at it tonight and I'll figure out what to do with it from there. The way today has gone, I'm getting pretty close to scrapping the chassis and selling the rest as parts.
What's wrong? I wouldn't scrap the chassis, just take the time to grind anything questionable out and reweld. If you have issues find someone competent locally to help you out. Putting together a cage shouldn't be a race-quality comes first. That being said, most of the cages I've seen in person and on the net especially are pretty poorly welded. The biggest problem with mig is it's easy to have a cold weld that looks good but has either poor penetration or fusion. Everyone thinks you can just pull a trigger and mig weld, but you can't. Don't be that guy.
trackbird
Apr 27 2010, 11:03 PM
Oh, I'm not that guy. We cut scraps, welded, cut apart, etc. We're using plenty of heat (and then some...without vaporizing everything in sight). I'm getting bubbly/porous welds, grinding through them and getting them back even worse. I actually can mig pretty well and I have some talented help, but I'm about tired of dealing with this thing today. I came home early today to grind out some stuff from last night, did it 3 times or so and now I'm still fighting the same problem. Several other welds have been ground out today as well. I even put a new diffuser, tip and nozzle on the mig gun today to see if it helped. It's not so much a race, it's all fitted and just needs placed, tacked and welded. This really shouldn't take long at this point...
Blainefab
Apr 27 2010, 11:04 PM
QUOTE (trackbird @ Apr 27 2010, 03:21 PM)
QUOTE (trackbird @ Apr 25 2010, 10:18 PM)
With any luck, the cage will be done tomorrow and I can start on the seat mount and brackets for the dash...(and the rest of the list).
So much for that idea. Suddenly nothing is welding right and I'm grinding more welds out than I'm putting in...only to have them look worse than before. Racerdad916 and I are going to look at it tonight and I'll figure out what to do with it from there. The way today has gone, I'm getting pretty close to scrapping the chassis and selling the rest as parts.
Gas flow issue? Regulators can crap out, hoses collapse. Do you feel gas flow at the nozzle? Swapped tanks recently? I've gotten contaminated tanks, twice.
trackbird
Apr 27 2010, 11:06 PM
I swapped the tank a few weekends ago. Half of a couple welds looked good today, then it all goes to hell. If it was just one, I'd think "ok", but 3 times in a row? I've welded several things just fine with the current tank, though I'm about to vent it and take it to my welding shop (it was an exchange from Thoroughbred cylinders at tractor supply (which is where I bought my original bottle). I have good gas flow at the nozzle.
robz71lm7
Apr 27 2010, 11:42 PM
Check the two o-rings where your gun hooks/connects to the machine. Also check your gas diffuser if that unit has one.
trackbird
Apr 27 2010, 11:45 PM
QUOTE (robz71lm7 @ Apr 27 2010, 07:42 PM)
Check the two o-rings where your gun hooks/connects to the machine. Also check your gas diffuser if that unit has one.
I'll check them in a few (if/when I go back to the garage). Diffuser was replaced today with one with an O ring at the base (and a new nozzle and fresh tip...just to be safe).
Phil
Apr 28 2010, 01:24 AM
had this happen to me when the wire connection on the ground clamp got loose, maybe check it? Crappy welds, i guess not really porous since there was still gas, but crappy all the same
trackbird
Apr 28 2010, 02:26 AM
We ground on stuff some more, and we managed to get the welds in place properly...or mostly so.

But this still irritates me.
slowTA
Apr 28 2010, 03:10 AM
My welder started acting funny after I ran out of wire and replaced a small spool with a large one. The wire was a different brand and I think it was off by +/- .001". It took a while to re-adjust everything but I remember the main issue was that the wire would turn into a flame as soon as I started welding!
rocky
Apr 29 2010, 11:20 AM
I finally finished reading this build. Thanks Kevin.I learned a few things that I know will help me in the future. 2 quick examples are: Use a knotted wire wheel to get the sealer off and do not let sparks hit the glass. I do not think I am gonna go in as deep as you did with yours, probably end up there. Everyone knows how that goes. Keep up the good work. I can't wait to see some videos.
trackbird
Apr 29 2010, 12:13 PM
Thanks Rocky. The cage is almost done. We're pretty much down to gussets, the window support (FIA) bars and fabbing the seat mount (and I have to patch the firewall and remount the clutch master cylinder. The previous owner [2 owners ago] did the 6 speed conversion drilled a bunch of holes for the master cylinder in the wrong place and "patched" them with duct tape). Then I hope to get the interior painted, install the starter and ignition and wire it all up. We'll see how that goes... I have been lazy about posting pics lately, but I have a few more to post soon. If I can save someone some time, money or effort by learning from my mistakes, then it was worth it to document this whole process. I've learned a lot of things I'd do different. I told Bill (Racerdad916) just last night that "I'd love to start over and build another one now, we could do so many things better, prettier, and more efficiently. I'd love to apply what we've learned and start with another shell and a tubing bender". But I figure I'll save those lessons for the next car...there's always a next car (eventually).
And I have to credit Alan Blaine and Mitchntx/GlennCMC70 for the knotted wire wheel trick (and too many other tips/tricks to count).
rocky
Apr 29 2010, 02:35 PM
I forgot one question I had regarding your cage install. You said you cut holes to drop the bars through so you could do the weld properly.Are you welding the metal back in or just covering it with the plates? If you cannot answer the next one then hopefully one of the NASA guys can, is either way ok or does it need to be done a different way for NASA and CMC?
trackbird
Apr 29 2010, 02:47 PM
QUOTE (rocky @ Apr 29 2010, 10:35 AM)
I forgot one question I had regarding your cage install. You said you cut holes to drop the bars through so you could do the weld properly.Are you welding the metal back in or just covering it with the plates? If you cannot answer the next one then hopefully one of the NASA guys can, is either way ok or does it need to be done a different way for NASA and CMC?
You pull the cage back up through the holes and set it on the floor plates. Then you weld in the floor plates and weld the cage to the plates. You don't have to patch the hole, though you might consider welding the sheet metal to the bottom of the floor plate (at least a couple stitch welds). That's pretty standard for doing a cage for any sanctioning body (as far as I know, maybe Alan will drop in here and add more on that).
Blainefab
Apr 29 2010, 07:53 PM
QUOTE (rocky @ Apr 29 2010, 07:35 AM)
I forgot one question I had regarding your cage install. You said you cut holes to drop the bars through so you could do the weld properly.Are you welding the metal back in or just covering it with the plates? If you cannot answer the next one then hopefully one of the NASA guys can, is either way ok or does it need to be done a different way for NASA and CMC?
Make the holes only as large as necessary to get the tubes thru - typ 2" dia. Make sure the plates cover the holes with a generous margin, and weld the plates all round. The edges of the holes can be welded to the bottom of the plates if there is access, but it isn't mandatory. The strength of the cage plates comes from their design, not the integrity of the pan sheet metal. Wrap the plates up onto the vertical sill, and tie the cage tubes to the vertical section as well as the base, and the hole in the pan will not be significant structurally.
This is the clause in CMC rules that allows holes to be drilled for safety equipment:
7.8.8 snip
Other than to provide for the installation of required safety equipment or other authorized modifications, no other driver/passenger compartment alterations or gutting is permitted.
trackbird
Apr 30 2010, 02:25 AM
The diagonal and harness bars are in and the inverted V, dash bar and strut tower bars are final welded as well. We're down to fitting the seat, the foot well bars, bars from the main hoop (at the floor) the the rear shock mount, a second bar parallel with the harness bar for extra strength and the gussets.
Closer...
rocky
May 1 2010, 01:28 AM
Thanks Alan for the answer. I did not know thats what that section meant. So far since I have been reading this thread I have learned something new everyday.
trackbird
May 2 2010, 04:47 AM
I put the stock seat back in to take measurements for the seating position for the race seat and I fabricated the drivers side footwell bars. I spoke to Alan and he suggested running the upper bar to the intersection between the top bar and the dash bar, but there's no way to get the tube in there without notching the metal in the dash (and to get a welder in there with it was going to require lots of cutting). So I'm not thrilled with the location, but I still think it's better than a single tube running to the footwell, so that's what I did. It's going to make it tight for placement of my left foot when it's not on the clutch, but I'll find a way to work with it.
trackbird
May 3 2010, 02:24 PM
I started on the seat mounts last night and have lots of fitting to do (I have to re-cut the first bar). And, I swapped out hole saws on my tubing notcher. I got in a hurry, grabbed the handle of my Milwaukee 1/2" (8 amp) drill and popped the hole saw loose. I knew not to do that, but I was tired and figured I'd get away with it just once. I didn't. I bent the output shaft and/or the chuck of the drill. The output shaft is $20.70 from Milwaukee, the chuck is $74.75. A new drill has gone back up to $140-ish (I paid $99 on special) and I don't know exactly what is bent. I guess I see a new drill in my future and this one is likely to land in the parts bin. Damn. I've done more out of character stuff on this project between fires and broken tools... Anyway, don't do what I did. This is a public service announcement.
Edit:
After seeing the price increase, I wound up taking the drill to a local Milwaukee service center for an estimate. We'll see what happens from there. I'll fix this one, or have them order me a new one.
trackbird
May 5 2010, 04:14 AM
Ok, we made some progress on the seat mounts. Tomorrow I'm going to section the rear factory seat brace and put a section of 1 x 2" steel in there to give me a flat surface to sit the seat on and bolt it down. I'm going to fully weld it to the flange from the factory floor bracket and stitch weld that to the floor. It will be plenty strong. The front required a spacer, that's how the 1" square stock got on there (the lower bar is fully welded, the upper bar is stitch welded and will have the seat bolts running through it and out of the bottom of the 1 x 2" bar). I tried to mount my seat as low as Dave Algozines (based on Alan's pics) and it was just too low in the front. So, I think this should fix me up at the expense of an extra 2 lbs of steel (it's plenty strong). It's welded to a floor plate on both ends and the outboard end is notched and welded to the bottom door bar. I guess overkill is still what we do best.
trackbird
May 7 2010, 04:33 AM
The final cage bars are all cut and most of them are welded in place. Some aren't tacked, but I have the gussets from the main hoop to the harness bar laying in the car (cut and fitted), one of the rear bars from the floor at the main hoop to the backstays is fitted and laying there, the other is welded. Some of the bars need finish welded, but it's all there (or cut and fitted and ready to go once we clean things up and weld). Here's some quick photos I took once I finished up tonight.
The front window corner gussets line up better with the FIA bars (from the top of the front vertical row of door bars to the A pillar bar) than they look from that angle. I actually walked around the car and looked at it after shooting that picture).
Tomorrow we finish weld (and mount the seatbelt brackets and seat), then we assemble and wire.
And I'm sure I've mentioned it before, but I wanted to take another moment to thank Alan Blaine and Blaine Fabrications for all the assistance, guidance and putting up with the late night phone calls. Thanks!!!
92Voodoo
May 8 2010, 04:08 AM
QUOTE (trackbird @ May 6 2010, 10:33 PM)
Tomorrow we finish weld (and mount the seatbelt brackets and seat), then we assemble and wire.
Sounds like you'll have it finished by the time I arrive! Congrats on the progress.
1meanZ
May 8 2010, 01:34 PM
congrats on the progress Kevin. It's really coming along great. what color are you going to paint the inside?
trackbird
May 8 2010, 03:38 PM
QUOTE (92Voodoo @ May 8 2010, 12:08 AM)
QUOTE (trackbird @ May 6 2010, 10:33 PM)
Tomorrow we finish weld (and mount the seatbelt brackets and seat), then we assemble and wire.
Sounds like you'll have it finished by the time I arrive! Congrats on the progress.
Well, no welding was accomplished last night, but it's not that much left to do. So, I got the dash sorted and am ready to fab up the mounts and start wiring.
QUOTE (1meanZ @ May 8 2010, 09:34 AM)
congrats on the progress Kevin. It's really coming along great. what color are you going to paint the inside?
The interior is likely to wind up grey, like the roof and part of the cage that we already sprayed. I think it's going to get painted after NFME. I can't give up the time for the paint to dry right now.
trackbird
May 11 2010, 05:47 AM
First, the local Milwaukee repair shop fixed my evil 1/2" drill under warranty. They replaced the chuck and called me to come get it. Price=Free...Time=1 Week.
Ok, the MSD starter is in. The coil is mounted. The Techrods wiring harness is partially in place (the part of the harness that fits, I'll extend the wires tomorrow and I hope to have the rest of it wired up as soon as I make it fit). The cage is final welded and everything is there (except the upper gusset from the main hoop to the halo bar since I'm not sure how I want to do that yet). The seat is mounted to the floor and the seat brackets have been tig welded together (they were too hot to touch, so they are still on my bench). We're going to finish the seat brackets, paint the interior and get back to wiring as soon as the paint dries. I have lots of work to do, and a few days off to do it. We'll see what happens.
And I need to thank Bill (92Voodoo) for spending the evening fitting/shimming a starter (and clearancing an oil pan so it would fit), changing oil and helping with the seat mounts while I welded up brackets. That starter was a frustrating, tiring and messy job and I owe you several beers (and probably another dinner). Thanks!!!
trackbird
May 12 2010, 07:25 AM
Ok, the interior is painted, MSD is mounted, the ECM is on "shock mounts" and will be mounted as soon as I get the wires inside from the wiring harness. We fixed some of the harness issues tonight and will fix the rest tomorrow. The Techrods harness just isn't "right" and there are a few leads that are impossibly short. That should be sorted asap. The bracket for the accusump is done and the bracket for all the relays, etc is done (I just need some hardware to bolt things down) and the battery box is mounted. Also, the car is back on the ground. I haven't seen the thing sitting down in so long, I thought it was supposed to be 6 feet tall.We'll put in another full day tomorrow and see if it's running by tomorrow night. I'm off to bed, here's the pics.
1meanZ
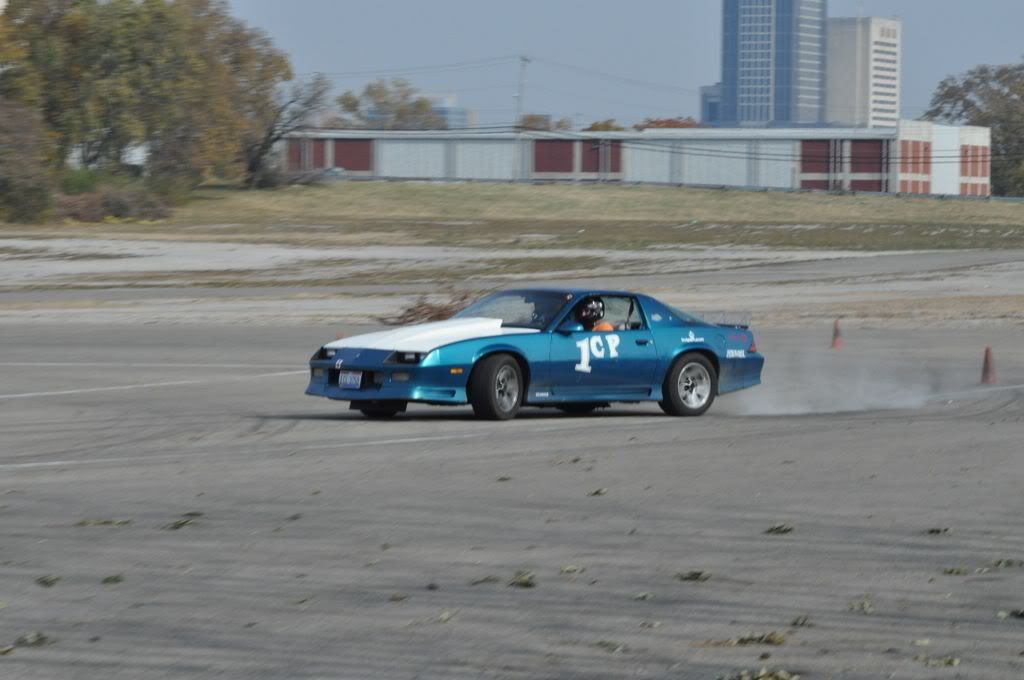
May 12 2010, 12:38 PM
here is what it looks like on the ground in case anyone forgot....

Pony Exp.305
May 12 2010, 01:57 PM
Good Job-Kevin
Can I drive your car at NFME

See ya there.
trackbird
May 12 2010, 01:59 PM
QUOTE (Pony Exp.305 @ May 12 2010, 09:57 AM)
Good Job-Kevin
Can I drive your car at NFME
See ya there.
Heck, I hope I can drive my car at NFME. Off to the garage!
This is a "lo-fi" version of our main content. To view the full version with more information, formatting and images, please
click here.